Product Details
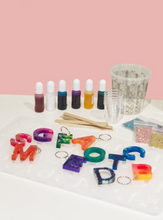
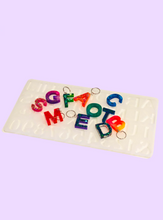
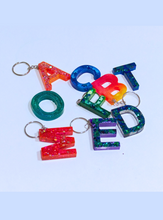
Personalise and accessorise with our new keyring kit! This kit comes with everything you need to create your own fun, personalised alphabet and number keyrings. But the fun doesn’t stop there! This versatile kit can be used to create custom name plates, fridge magnets, or decorations – the possibilities are endless.
What's Included

- 1 x 450ml set of epoxy casting resin (300ml part A, 150ml part B)
- 1 x alphabet and number mould
- 6 x holographic glitters (peach, purple, aqua, green, gold, peacock teal)
- 6 x alcohol based inks (pink, purple, blue, green, yellow, sinking white)
- 5 x keyring chains
- 1 x 300ml measuring cup
- 5 mixing cups
- 5 mixing sticks
- 1 x pair of disposable gloves
- Safety data sheet and instructions
This mould is durable and reusable meaning this kit can be enjoyed many times over!
To maximise the versatility of this keyring kit, add an epoxy pigment palette for opaque saturated colours and a different effect or why not try a shimmer pigment pack to make your keyrings pop!
Instructions
- Prepare your workspace. Cover your table with a disposable plastic tablecloth or some baking paper to protect it from the resin, lay out your mould and supplies and pop your gloves on.
- The casting resin in this kit is a 2:1 ratio resin. To mix your resin accurately, measure 2 parts of 'part A' to 1 part of 'part B' (e.g. 200ml part A + 100ml part B). To figure out how much resin you will need to mix, fill your moulds with water and pour into a measuring jug to find the volume needed. Stir your resin thoroughly for 2 minutes, ensuring to scrape the sides and the bottom edge so that it is all incorporated.
- Work your magic! Mix dye into clear resin before pouring into your mould for a solid colour or for more intense and speckled colour effects, pour clear resin into your moulds and then add droplets of dye over the clear resin. Swirl a mixing stick through the dye drops to blend the colours slightly. Add your glitter by mixing it into your resin before pouring into your moulds.
- Once you have poured your designs into the moulds add your keyring chains into the resin while it is still wet ensuring the large keyring loop stays out of the resin. Leave them to cure for 48hrs before demoulding. Resin may take even longer to fully cure in cooler conditions.


